Wednesday, April 26, 2023

Wooden Automata

I was inspired by an artist on Instagram named Amedeo Capelli who creates automatas to do this project.
Before beginning, I wanted to practice creating one, so I sketched out what I would need to make it work and then make a model out of wooden skewers and a box to get a feel for the design and how everything would interact. This project has to be the most ambitious thing I have made, due to the fact that it has gears and is designed to move.

My first step was piecing together the box. I measured the cardboard box I had used as a mockup for my dimensions and cut a large piece of wood to scale. Instead of drilling holes, I used a nailgun and woodglue to piece it together. In the top, I drilled a hole and set a small copper tube in, so that the 1/8th size dollrod would have room to move up and down. Inside of the box, using a gear I made out of a bigger wooden dollrod, I glued it to the bottom of the smaller one. I glued itself to the copper tube and I had to reglue it and be careful to make sure it did not attach itself. Once that was done, I moved on to the handle.

For the handle mechanism, I drilled holes in both sides of the box at the same spot. Using the same 1/8th dollrod, I put another wooden gear, this time in an oval shape on the rod, along with a piece of cork. Once inserted, on the end I put a longer piece of wood to act as a crank and then I screwed a handle in, securing it with woodglue.

Instead of creating a wooden figure to go on top, while the box and crank were drying, I created a needle felted frog to be placed on top. His limbs would be looser, allowing him to wiggle more as the mechanism went up and down.


Working with Wood


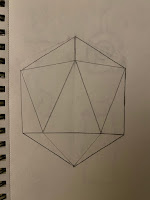
Before beginning the woodworking process, I sat down to sketch some abstract shapes. I did not have a direction in mind when sketching, however all of the sketches ended up very geometric rather than rounded, as well as having some sort of square or diamond in them. It reminded me of snake patterns as I drew and perhaps I had a snake pattern on my hands, which would impact how I decorated my final product.

I made a mockup of the final design I chose out of balsa wood planks. It was at this point I had to decide my scale. I wanted to challenge myself, as this was the first project of the class and my first time making a wooden sculpture, so I chose to make it to scale. I measured how many inches the balsa wood pieces came out to and translated that into feet, which would transfer over to what size wood I cut.
I began with cutting the "legs" and "antennas" (as I began to call them) and sanding those down. I wanted them smooth to avoid splinters and imperfections as I worked on it. I attempted to use a sanding machine, but it wasn't getting it as smooth as I wanted, so I hand sanded all 6 pieces with p60 grit, then p120, and finally p320. At this point there was a bump in the project, as our space to work caught on fire and the project was a little delayed. My other projects took precedent over this one and eventually, when I came back to this one, I had more knowledge of what to do with some objects, which helped me in the long run.
After my break from this project, I joined the pieces together. The diamond shape pieces were around 3 feet long, while the legs and antenna were around 2 feet each, making this piece bigger than I anticipated. As I had it placed on the ground to put together, I realized this looked more like a frog swimming in water or splayed out. I decided for decoration I wanted to coat it with a layer of dark blue paint to resemble a poison dart frog, as they are super tiny and this project was super huge.


I took the final images outside in the grass, to really capture the frog essence. But, I want viewers to form their own opinions about this piece and what they think it is, which is why I chose to leave it upright. I can be placed upright and on the ground. For scale, I used myself to show how big it is. I am around 5'7, showing that this piece is quite big.

Saturday, April 22, 2023

Working with Found Objects


One of the first things I thought of before I found anything for this project was the toothpaste cap city that Charlie Bucket built in the Charlie and the Chocolate Factory (2005). It was such an excellent commentary on how happy such a simple thing, such as deformed toothpaste caps that his father brought him from his job, made Charlie. And Charlie, being such a wonderful kid, was making a model of the Wonka Chocolate Factory where his Grandpa Joe used to work. 

For this project, instead of going somewhere like Goodwill to "find" objects, I opted to look outside and in the trash. Since this was a class project, our professor basically had a stash of cool things kept outside for us that were disposed of. I found a microwave and a Nikon photo scanner from around 2001. I've actually found that on places like Amazon, the Nikon photo scanner sells for upwards of $2, 993. The microwave, I am unsure of, but it was cool to tear apart such expensive machines and see how they worked.

Once I had successfully removed the insides of both machines, I was left with a bucket of wires, fans, and coils. I had forgotten about the toothpaste cap city and was stuck on what to do. I played around with the idea of doing an aerial view of an open heart surgery, as my mom has recently had heart surgery, but I could not get things correctly positioned the way I wanted. It was not until a friend of mine pointed out that the way I had positioned a motherboard and a battery together looked like a city that I was reminded of the toothpaste cap city.

From here, I launched into creating my own little mechanical city. I was hot glued pieces onto the motherboard and onto one another to assemble it. There are smaller motherboards on top of one another to represent different areas of the city. The lightbulb is the city powerplant, with cogs turning to power it. There is an arch, a welcoming into the city. Grey apartment buildings scattered throughout. Round black buildings as the hubs of entertainment. The clear pieces are water, with a small chip as the dam.
The city is a booming metal, mechanical, metropolis. In many ways, it represents our own today. I thought about the toothpaste cap city and how in the film, Charlie's dad's job was being replace with robots. Much like our own society, many jobs are being replaced with AI. My own mother does work that advances the progress of AI everyday. Eventually, in some ways, I'm convinced the world may be like this- bleak and metallic, maybe the grass might just look like a motherboard if we stare hard enough. Maybe the water is wires and we just cannot see. Progress is coming faster than we can really see, but at the same time, it is still so far behind and we think it's more advanced than it really is.


Working with Mold Making

 In a previous project, I had molded a pack of my dad's cigarettes out of clay. I wanted to attempt to now reproduce the cigarette portion of this piece, so I could then fill up a wooden box with reproduced cigarettes for a commentary on how the production of cigarettes can and ultimately kill you. However, this did not work out the way I intended it to. 


The first step in the process went well. I created a box using leftover scraps from a foam and plaster project, taping up the sides and hotgluing them so no silicon would leak. I used a different type of clay to start the mold, pressing down on the molded cigarettes to indent it, carving out where it needed to sit and then making sure it fit snug inside, so no silicon would drip underneath when I poured it in. Before I did anything, I was advised to add little lumps of clay to help with the silicon and make sure I wasn't using a ton. I mixed silicon together, and poured it over, waiting a day between to make sure it set. I did do this process wrong at first- I was supposed to make "keys"- little indentations where the silicon could separate from itself once I poured the top half over- but due to my mold ending up so lumpy, it worked out.
Once the silicon was dry, I poured plaster over it. This process was less tedious than the silicon mixing. I waited another day and flipped the mold over, repeating with another layer of silicon and another layer of plaster. This is where my project was flipped a bit upside down. The second layer of silicon seemed to have been bad and even after waiting almost a week once my mold was done and I poured plaster in to finally made a set of cigarettes, my cigarettes came out still wet and crumbled into a little mess in my hands. They were half formed, like the plaster had been sucked up and the mold was wet, as if someone had poured water in it.
In a desperate attempt to save my project, I tried to make a quick mold out of the clay that I had originally formed the cigarettes out of and a hot glue stick. I figured that I could carve away at the results of the hot glue stick to achieve the cigarette look.
This seemed to work well, with no leaks and it filled to the top. However, after a day had passed, I came back to a complete brick. I tried to carve it and break it, but it was not breaking.
In an attempt to comment on how destructive cigarette addictions can be, my process through this journey also felt like a strong commentary on addiction in general. Addiction to not cigarettes but perhaps impulse. I have a strong impulse to get things right, to fix everything. I have OCD and luckily it is managed but I believed this project was going to be the death of me. I want every project I do to have meaning and look good, but I have had to learn that my addiction to being someone who is perfect is not who I am meant to be. I am meant to be like this lumpy brick of plaster- a form that could possible be carved away at, but may never be. 

Thursday, March 2, 2023

Working with Modeling

In Process


The object that I chose to model was my dad's pack of cigarettes. It is something I see everyday and without even touching it, I know the shape well. I am with my dad almost 24/7 and his smokes are always on him.


At the beginning of the process, I had a circular mound of clay. I rolled it out and pounded on all sides to make it into a box like shape, shaving off clay where I needed with tools. I decided to upscale the object for this project, so the cigarette pack is larger than the actual one.


After making the box, I measured out how long the cigarettes would be according to the upscale box. I didn't want them to be too skinny or too fat, so I had to hold them in between my fingers and make sure they didn't fall apart when I held them. I used a small plastic knife to make the ends clean cut as if a factory had rolled them out.


Final


Monday, February 20, 2023

Foam and Plaster Sculpture

Sketches

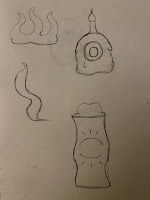
The original sketches for my idea were formed ideas and not very abstract. I was originally going to create the object in the bottom right of the second sketch page, but when creating, I was taken in a different direction as I used the materials.


In Process
The base of the sculpture.

The sculpture without plaster.

Beginning to plaster.

Finishing the first coat of plaster.

Reinforcing the base after two coats of plaster.
Final


This piece, entitled "Foundations: Memories of the Broken", it explores themes of humans and their identity. Specifically, this piece is related to the foundations of childhood and growing up. The gold covers most of the base of the sculpture, showing very little of the places that the plaster did not cover, travelling upwards to cover the mesh joints holding together the circular pieces and the circles themselves. As the piece ascends, there is less gold covering it and you can see the cracks in the plaster and the doll rods holding them together. The purpose of the piece is to connect with the audience in the sense of growing up and losing your sense of "goldenness" or your childhood and having to be vulnerable. My inspiration for this piece came from my own life and the difficult decisions within them. I also drew inspiration for the golden paint splats from Jackson Pollock paintings.

Wooden Automata

I was inspired by an artist on Instagram named Amedeo Capelli who creates automatas to do this project. Before beginning, I wanted to pract...